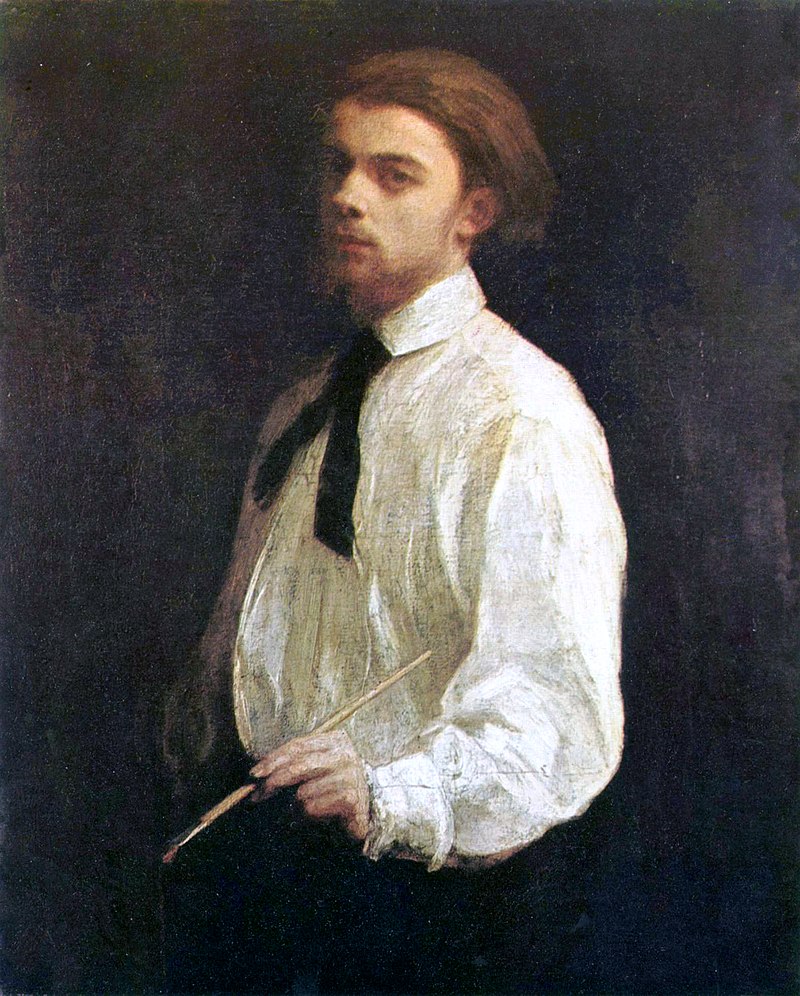
 Henri Fantin-Latour, Self-portrait (1859), Museum of Grenoble
0 Comments
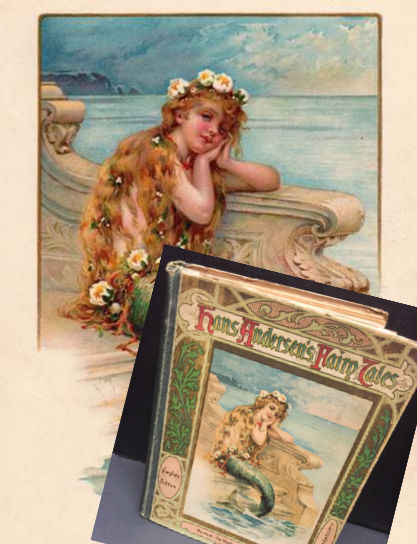
Our Mystery Artist had a pen name of E. S. Hardy although she was known among friends as Evelyn Stuart Hardy. Her actual birth name is Beatrice Evelyn Elizabeth Hardy. She was commonly said to have been born around 1870 in Bristol, England. Her whole family was very artistic including her parents who were both artists.
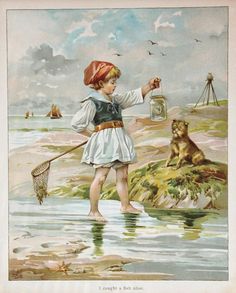
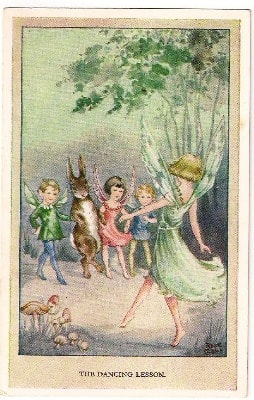
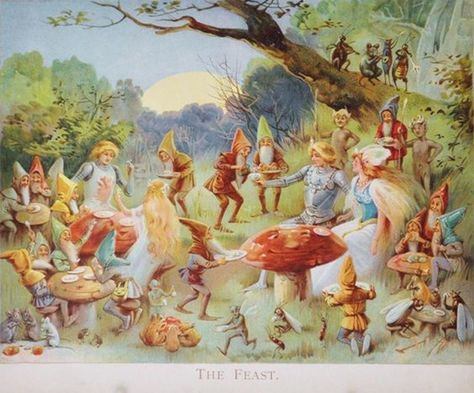
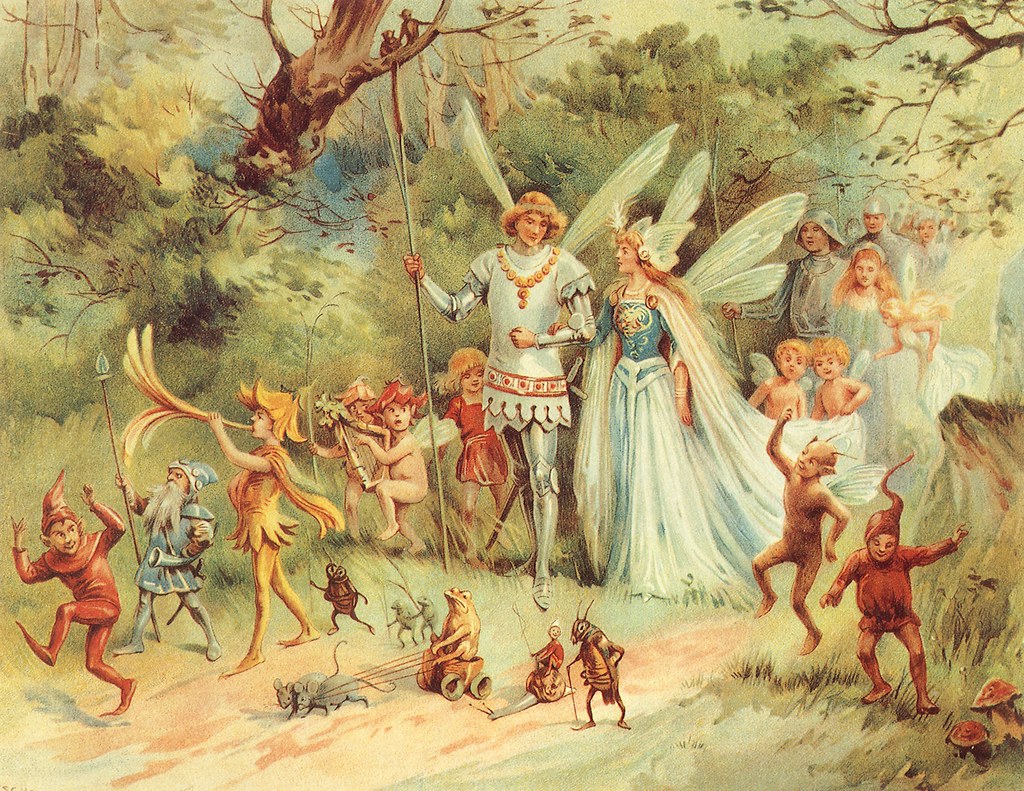
In her lifetime, Evelyn illustrated many books and periodicals. Her work was prolific and her illustrations were very popular. She created work for "A Visit to Fairyland with Humpty Dumpty" in 1898 which was reviewed as "an ingenious and elaborate conception". She created moving figures and animals in pop-up books that were amusing and fun. One of Evelyn's notable works was the beautiful mermaid painting (shown above) which was published on the cover Hans Christian Anderson's book of Fairy Tales. You can see more of her wonderful illustrations that include bible stories, fairy tales, children, and much more HERE> I particularly love her whimsical fairy scenes. They are purely delightful! Her color palette is soft yet engaging in these illustrations. Her little mermaid is gorgeous to say the least with the flowers in the hair and little artistic touches. Evelyn also created a whole series of bible story art that is amazing too! It's no wonder her work was so popular! You might even be able to acquire one of her pieces, as many have been sold at auctions. She also wrote a few of her own books which include: The Book of Gnomes (1895), At the Farm (1920), Me and my Doggies (1924), and Me and my Ponies (1925). Evelyn was a fantastic artist who brought joy and color to this world in her lifetime. She passed away in Sussex, England in 1935.  Gifts from Amazon...
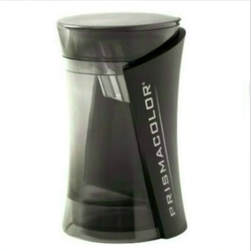
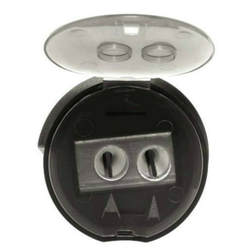
10) Tombow Dual Brush Pen Art Markers - Grayscale >> These dual brush pens have a versatile and flexible nylon fiber brush tip on 1 end that creates medium or bold strokes by simply changing brush pressure. The fine tip on the other end is for smooth straight lines or writing. The resilient nylon brush retains its point, stroke after stroke. 9) Tombow Dual Brush Pen Art Markers - Various Colors >> Ideal for fine art, brush lettering, faux calligraphy, illustrations, water color illustrations, journaling and more. Odor-less & non-bleed water-based ink. 8) Tombow Mono Permanent Adhesive Bundle >> Great value bundle! Bonds instantly, cleanly (no mess) and wrinkle free. Safe to use on paper, photos, cardstock, etc. 7) 3 Tier Rolling Cart Organizer >> A smart storage utility cart for art supplies. Easy rolling and perfect for an art studio! 6) Prismacolor Premier Colored Pencil Set - 72 Colors >> Prismacolor Premier is one of the best wax-based colored pencils available! They have soft thick cores which are perfect for shading and highlighting. Gifts from Erika Joane Art... 5) Bamboo Duster Brushes >> These very soft dusting brushes are a must for the colored pencil artist! If you don't clean up as you go, the pencil crumbs will become embedded in your work. Comes is 2 different sizes. 4) Battery Operated Grinding Sharpener >> This fast sharpener is small and durable and perfect for transporting on the go. You'll get a perfect point every time with this grinding sharpener! We're impressed and love it! 3) Innovative Pencil Mediums Set by Jo Sonja >> A great combination of mediums - perfect for the Innovative Pencil method! Includes: All Purpose Sealer, Flow Medium, Retarder, Fast Drying Glaze Medium, Matte Varnish, & Brush Cleaner & Conditioner. 2) Innovative Pencil Paint Set by Jo Sonja >> A great combination of 10 Jo Sonja colors that work with our Art Pattern Kits. Includes: Brilliant Magenta, Carbon Black, Colony Blue, Mouse, Mulled Rose, Mustard Seed, Napthol Crimson, Pine Green, Pacific Blue & Warm White. 1) Jo Sonja Sure Touch Choice Brush Set >> If you haven’t had a chance to try these NEW select fiber brushes this is the perfect opportunity! Jo Sonja has chosen a selection of their best sizes for this brush set. Total cost to buy each brush individually would be $50.00! That's a SAVINGS of $25.05! Merry Christmas to all!!! ♥ ~ Erika Joanne  8 Gluing Tips for Artists
 1) Weed Out
Go through your art book and magazine collection one-by-one and weed out what you don't need anymore and can give away. You could have duplicates or your style has changed. Either way, it's important to clean out what you don't need. 2) Mobile App Help Use a mobile app to catalog your collection. There are a variety of cataloging apps available (Library Thing, Libib, Book Buddy etc). 3) Within Reach Display your collection where you can get to them easy, preferably on shelving near your painting/art area. 4) Currently Using Put the few of your favorite books and magazines, that you are currently reading, in a separate area where you can clearly see them and reach them comfortably. 5) Organize There are a variety of ways to organize your collection. You can arrange them alphabetically - by title, author, subject, or even by color. 6) Display Options You can group your collection in magazine holders, notebooks, and just vertically on a shelf using book ends if needed. 7) Preservation A great way to preserve your collection is to cover your favorites with clear book jackets. This can be especially helpful in keeping your books and magazines nice when painting around them <wink!> or when loaning them out. Also, keep your magazines & books dusted and out of direct sunlight which can be very damaging. 8) Quiet Enjoyment Find a quiet place to sit and take time to enjoy your lovely collection. Use book marks or sticky notes to keep track of your favorite projects and articles. Happy Collecting & Organizing! Ta Ta for now! ♥ ~ Erika Joanne  Sharpening colored pencils is actually one of the most challenging things about using them. Once you understand the basic principles of sharpening and have a few skills in your pocket, you're off and running! 1) Know What They're Made of You can lengthen the life and better care for your colored pencils by knowing what they're made of. The Prismacolor Premier Colored Pencils have a soft waxy core that is surrounded by a wood casing. Although the wood casing is hard, the soft waxy core is vulnerable to breakage and can be surprisingly fragile. It's very important to be gentle in the handling of your pencils since the core can break on the inside of the wood casing and cause all kinds of frustration when sharpening. With that said, there are huge benefits from working with a soft waxy core - albeit fragile. The highly pigmented soft core with superior blend-ability gives you a smooth lay down of color without much effort. 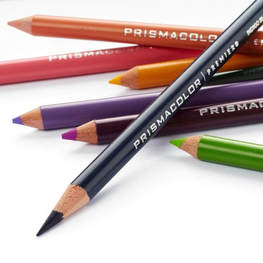 2) Starting the Point Prismacolor now sharpens their pencils so they come to you pre-sharpened straight from the factory. This is very handy since one of the toughest things about sharpening is starting the point. There are still some un-sharpened pencils floating around out there so here are few good tips if you run across any. I've found you can reduce breakage in your pencils, that haven't been sharpened yet, by sharpening them as soon as you purchase them. Create the point with a gentle and smooth electric or battery operated pencil sharpener. This will get you off to a good start in sharpening. Then you can maintain the point using a hand-held sharpener. Try and avoid long periods of sharpening by doing your best at keeping a nice point on your pencils. This is done with shorter stints of sharpening which equals less pressure on your pencils. 3) The Art of Hand-held Sharpening Always keep in mind that extra pressure on your lead can cause breakage. The way you hold the pencil when sharpening can literally make a good point or break it. If the pencil leans a bit while sharpening or if you push the pencil too hard into the sharpener, you can break it. Holding the pencil straight into the sharpener with steady gentle pressure is ideal. A trick that can be used is to switch up the way you would normally hold your pencil while sharpening. Instead of turning the pencil into the sharpener, change it up and hold the pencil in your opposite hand and turn the sharpener with the other.
4) Don't be a Dull Sharpener The metal blade in your sharpener can start out sharp but then over time and use, become dull. The wax from your colored pencils is especially hard on a sharpener. Have you experienced short pencil shavings or the ripping and tearing of your pencil while sharpening? Most likely the blade in your sharpener is dull and it's time to replace it OR the sharpener. Some pencil sharpeners have replacement blades available. You can also look closely at your blade, it could be that the small screw needs tightening. However, when you consider how much you use your sharpener, It might be time to bring in a new one with a new blade. To lengthen the use of your sharpener, always keep a no. 2 pencil in your tool kit. The graphite actually conditions the metal blade, so sharpen it often to clean off the waxy build-up and bring longer life to your sharpener. 5) A Lead Stuck If your pencil lead breaks while inside the sharpener, you can gently remove the pesky broken piece with the tip of a graphite pencil. If it just won't come out, you can sharpen the same graphite pencil (which has a harder lead) through the colored pencil lead. Be SUPER careful though, you don't want to push too hard and ruin the balance of your sharpener. No one wants a wonky sharpener.  6) The Sanding Block The sanding block can be used as an alternative to using a traditional sharpener. It is basically fine sandpaper sheets stapled to a small wooden paddle. To sharpen your pencil, gently rotate it across the sandpaper as you shape it to a point. It gives you total control over the shaping of your pencil, although it does require a bit of work. Once the sandpaper is full of wax, just discard the top piece revealing a new fresh piece of sandpaper underneath. Having a sanding paddle in your tool kit is not a bad idea, they are especially convenient for travel.  7) The Long Vs. Short Point There are many varieties of sharpeners available and you'll notice that not all sharpeners are alike. Some sharpen your pencil to a long tapered point while others sharpen them to a short stubby point. Then there are sharpeners that have several point styles built in. The general opinion is that since the Prismacolor leads are fragile the short stubby point is a better choice when sharpening. Going against the grain... I've actually found that I enjoy working with a long tapered point and don't have too much of a problem with breakage. So the long and short of it is, you'll have to experiment with this to see what point style works best for you. 8) A Tip Saved = Happy Penciling! Have you found yourself happily penciling along only to have your beautiful lead tip drop right out of your pencil? A quick solution is to glue the tip back into your pencil with a drop of nail glue or super glue. Hold it together for a few seconds till it hardens and then you can resume your happy penciling. Keep in mind that when it comes time to sharpen your pencil again, you'll need to sharpen through the glued section since that area of the pencil won't produce color.  9) Warm Solutions for Broken Lead There are rumors out there that heating your pencils in a microwave can melt the broken core together. My advice is, "Don't do it!" Last time I tried this the metallic lettering caught on fire leaving a burn spot inside my microwave! Luckily that's all the damage it caused. It is true that heat can soften the wax and actually "weld" the broken core inside. A safer solution is to set your pencils in a warm, sunny spot for a few minutes. Try placing them inside a warm car or on a windowsill on a sunny day. If you don't have a sunny day to work with (often my challenge living in WA state) an alternative is to set your pencils on a heating pad for a few minutes.  10) Getting More Mileage
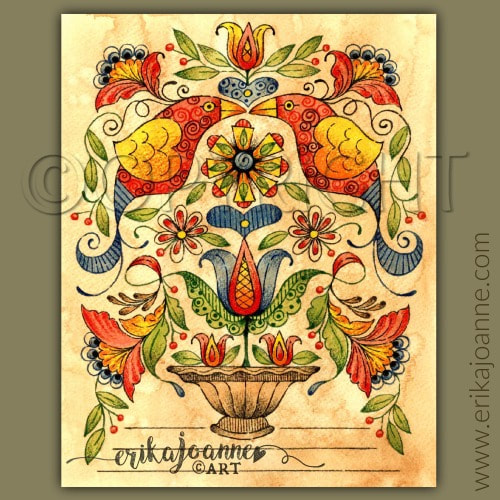
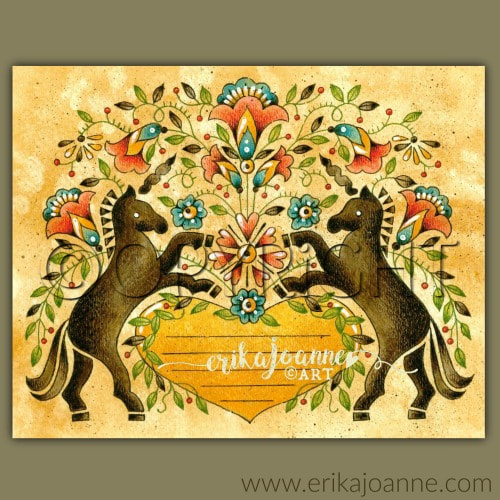
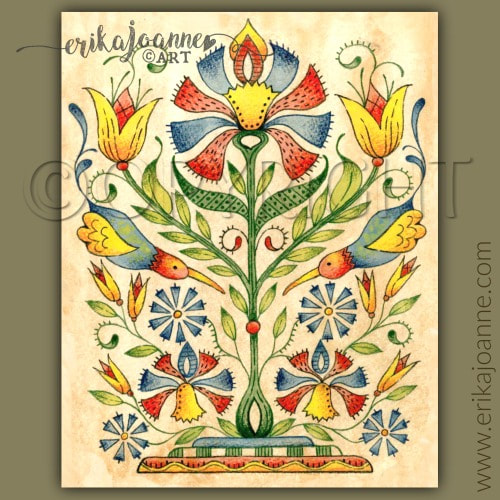
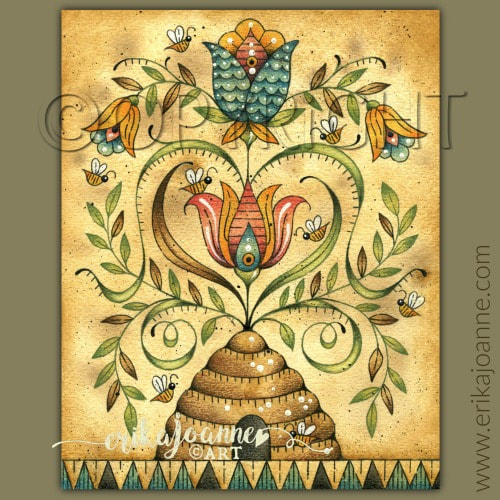
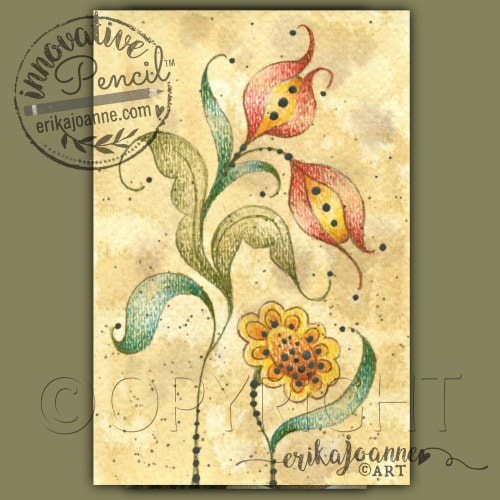
There are a few things you can do to get more mileage from your pencils. If your pencil is getting short, you can pop it into a pencil extender which creates additional length so you can get the last bit of use from it. Another way to add length to a short pencil is to tape the end of your pencil to the end of another pencil (blunt ends together). Also, while using your colored pencil, be conscious of the tip and rotate your pencil every few strokes. Using this motion is a great way to keep a point on your pencil reducing the amount of sharpening needed. Lastly, make sure to store and organize your pencils in a nice case or other storage option so you can protect them and get to them easily. You can avoid duplication when you know what you already have. Here's to Happy Sharpening!!! Till next time ♥ ~ Erika Joanne 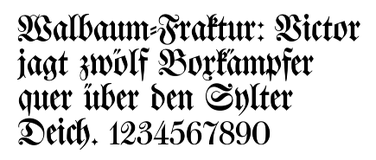 Quite frankly I didn't know what a fraktur (frahk-toor) was until I stumbled upon photos of them eight years ago in my reading about early American folk art. The need to explore this type of art quickly became a craving that launched me into a whirlwind of research. I was blissfully charmed away into the Fraktur world you could say, as I became aware of this unique and primitive art form. In my studies I learned that the word "Fraktur" means broken or fragmented. It is a gothic style of "broken" decorative calligraphy that was used to record and preserve history. It can be found on early American documents such as birth, baptism and marriage certificates. In addition to the elaborate lettering, these documents also included hand-painted decorative artwork. Whimsical Birds, flowers, hearts, angels, and historical figures (popular for the day) were painted with reds, blues, greens and yellows in a watercolor effect. Introduced to the new world by the Pennsylvania Germans, the "Fraktur" represented a unique and lively expression of early American folk art. 
These charming folk art fraktur’s were mostly created between the years of 1740 and 1860, but continued into the 1930’s. Today, Fraktur’s are highly sought after as an interesting look into the essence of early American religious culture. After scouring through articles and books on Frakturs, devoring anything I could on the subject, I had the opportunity to visit Williamsburg, VA.... This is where I saw Frakturs for the first time - up close and personal! I was enchanted to say the least. During my visit, the museum even had a little Fraktur art project to try. They must've known I was going to be there! Without hesitation I sat down among the rest of the youngsters and colored to my hearts content with the best of them. Yep, I admit it, I had become a Fraktur ART NERD for sure!
Inspired and ready to try my hand at this new found love, I created my first Fraktur pattern packet called "Fraktur Fancy". Next came "Fraktur Earth", "Hummingbird Fraktur", "Unicorn Fraktur", "Bee Fraktur", "Vintage Blooms", "Summer Blossoms" and 'Nantucket Natty". The creation of each art piece has been such an adventure! I love creating scrolling effects with the twists and turns of the various elements. Most commonly working on watercolor paper, I like to build the colors with a series of painted washes and colored pencil layers.
There is yet more to come - so be watching... My love of the Fraktur continues to grow and expand in my heart. ♥
The patterns mentioned are available for purchase. Just click on the links above. |

I'm Erika Joanne, an artist who enjoys "Sharing Innovative Ways to Paint & Pencil". Paint and learn with me through my pattern packets, videos & workshops. Enjoy!
Subscribe!

We would love to have you join us! Just use this QR Code to quickly sign-up to our email list using your smart phone.
Archives
May 2020
Categories |


 RSS Feed