Paint & Pencil Primer
Sharing Innovative Ways to Paint & Create!
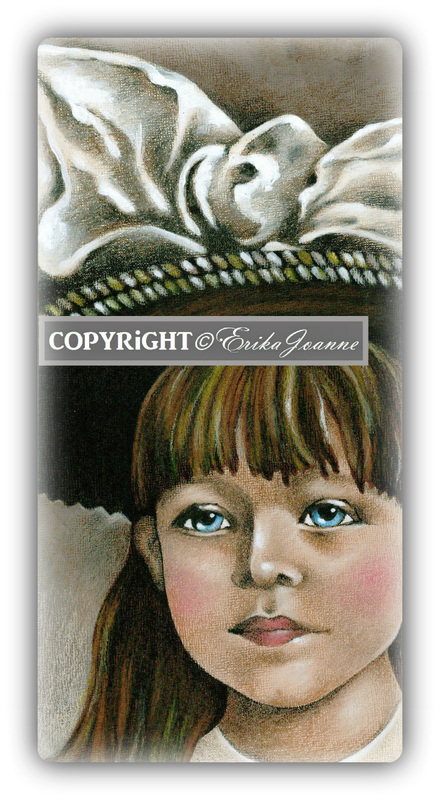
What is Paint & Pencil ?Paint & Pencil combines the use of two mediums - Acrylics and Colored Pencils.
Each of our unique Paint & Pencil designs incorporates the use of both Acrylics and Prismacolor Pencils producing amazing results! Acrylics offer a nice foundation for the colored pencils which in turn add the beautiful detail, shading, and highlighting.
View HERE > Explain Single & Multi-LayerEach Paint & Pencil pattern listed, states
whether it is a Single-Layer or Multi-Layer Colored Pencil design. The term "Single-Layer" means there is one layer of colored pencil over an acrylic foundation. Single-Layer designs are great for beginners and anyone who want to tackle a quick and easy project. The term "Multi-Layer" means there are several layers of colored pencils over an acrylic foundation. Multi-Layer designs are more involved and perfect for those who want to achieve a more realistic and blended look.
|
Explain Paint & Pencil TermsAcrylic Wash
The foundation of all my Paint & Pencil work is done with acrylics. An acrylic wash is a watered down light
transparent coat of acrylic paint. Acrylic Basecoat/Foundation An opaque coat of acrylic paint achieved by painting two to three layers of paint in an area. It is important to let each coat dry before adding another. In working with Jo Sonja paints, it is also very important to apply a medium between coats so the paint doesn't lift when another coat is applied. The last coat however should not have any medium included otherwise the pencil work will not take hold and adhere to the surface. Pencil Lining Producing lines with a sharp colored pencil. Pencil Wash Applying one light transparent layer of colored pencil. |
Single-Layer Pencil Shading/Highlighting
Applying a layer of colored pencil to shade or highlight a specific area. It is not unlike acrylic floating where the color is stronger on one side and fades to nothing on the other side. To achieve this, use heavier pressure in the areas where the color should be stronger and light pressure where the color should be lighter.
Applying a layer of colored pencil to shade or highlight a specific area. It is not unlike acrylic floating where the color is stronger on one side and fades to nothing on the other side. To achieve this, use heavier pressure in the areas where the color should be stronger and light pressure where the color should be lighter.
|
Pencil Duster A stiff flat 2"-3" bristle brush used to wipe away pencil crumbs between penciling steps. It is an essential tool needed to keep the pencil crumbs from embedding in your work. View HERE > Battery Pencil Sharpener A very needed tool for the colored pencil enthusiast. It is great for sharpening a new pencil point and for quick touch ups as you work. View HERE > Hand-Held Pencil Sharpener w/ Receptacle Perfect for in the classroom and travel where extra noise is not wanted. This sharpener can be held in the hand and has a nice receptacle for the extra shavings. View HERE > Pencil Extender A pencil extender is a nifty way to get the last bit of color from your colored pencil, save your hand and fingers, and enjoy more control in your penciling. When your pencil becomes to short to hold, simply pop into a pencil extender to extend the life of your pencil. View HERE > |
Helpful Paint & Pencil Tips
Protect Them
Fold a soft washcloth in half and lay it near your work area. Keep your project colored pencils on the washcloth while you work. This will protect the fragile wax lead inside and keep them from rolling off your table.
Fold a soft washcloth in half and lay it near your work area. Keep your project colored pencils on the washcloth while you work. This will protect the fragile wax lead inside and keep them from rolling off your table.
The Art of Sharpening
Sharpening is an art in itself believe it or not. It's always good to start sharpening a new pencil with a battery sharpener, this gets a great point on the pencil right from the start. If traveling or in a class, the point can then be maintained with a hand-held sharpener. Remember the lead is very fragile! When sharpening with a hand-held, any pressure to one side or the other, will easily break the lead. Make sure to hold your pencil centered in the sharpener to avoid breakage.
Lead Breakage
If the lead continually breaks despite using a good sharp battery sharpener, then it is possible the lead inside the pencil shaft is already broken. There is a remedy however.... The lead can be slightly melted by heat to weld the pieces together. This can be done by placing your pencils on a sunny windowsill or warm car for a time. I do NOT recommend using the microwave because the name imprints on the outside of the pencils will catch on fire! I know because it has happened to me and there is now a burn mark in my microwave to remind me.
Splattering Success
Believe it or not, I do often include a splattering step in my Paint & Pencil designs. There are a few tricks to have up your sleeve when it comes to splattering. Add a stiff toothbrush to your supply of brushes. It's nothing fancy but if used correctly, it'll be an important tool in your tool box. It is really important that it is a stiff toothbrush. If needed, you can stiffen the bristles with varnish. Spray your project with a coat of Workable Fixative to seal it before splattering, then if needed you can easily wipe up any splatter you don't like and try again. Next you'll need to go through a routine of steps in order to have the perfect splatter. First dip your dry toothbrush once into clean water. Then pat once onto a paper towel to remove the excess water. Remember, just one pat. Then swirl the toothbrush in the puddle of paint until well coated. Next hold the brush vertical (wherever you point the brush is where the splatter will end up). So point the toothbrush at your project holding it approx 6 - 8" above. Use your thumb on the same hand that is holding the toothbrush and pull it up the bristles to flick the paint. You might want to test the splatter first on your palette. If the splatter is too large then lightly pat once on a paper towel to remove some of the moisture. If the splatter is too small, very carefully dip just the tip of the toothbrush into water to add moisture. Make sure to avoid any faces when splattering. I will place a small piece of paper over an area I don't want splatter. You can easily and gently remove any unwanted splatter with a moist cotton swab.
Graphite Paper Goofs
Have you ever transferred a pattern only to find out you had placed the wrong side of the graphite paper down and didn't transfer a thing? For an easy preventative fix, place a colored sticker dot on the unwaxed side of the graphite paper. When transferring just make sure that dot is on the top side of the graphite paper facing you. With Paint & Pencil, it is important to use a fairly new piece of waxy graphite paper. Many of the project are done on textured surfaces so a newer piece of graphite paper works best. You also need to use the graphite paper that has a waxy feel on the graphite side of the paper.
More Paint & Pencil Tips to Come!
Our Patterns are FULL of Resources
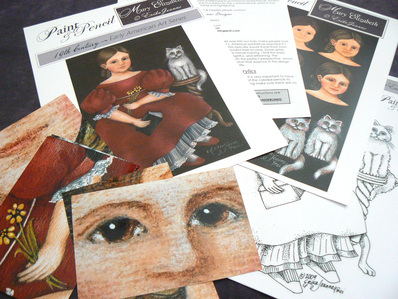
When you open one of our patterns we want you
to be pleasantly surprised at all that is included.
to be pleasantly surprised at all that is included.
Many Patterns Also Include :
♥ A Step-by-Step Worksheet
♥ A Highlighting Guide to boot! |
The beautiful visual helps, complete well-written instructions, and quality clean line drawings are included to help accommodate the different learning styles of our customers. If you tend to be visual, the pattern and instructions are visually appealing and include many quality reference photos. If you take in information better by reading, the instructions are clear and set-up to be easily understood. We also have a few lesson videos available to help those who need to see the creative process in action. Sharing innovative ways to paint and create is at the heart of our business! Happy Painting Smiles!


